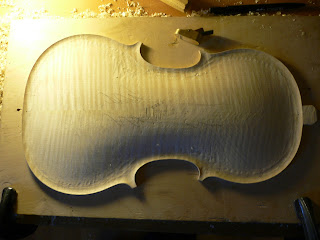
As you can see on this photo, I did the fluting (up to 0,5 mm over the final thickness) and quiet a lot of the arching before to cut the purfling channel. I really enjoyed to do it this way, it just feels more natural to carve arching and fluting together, as it is one full shape.
Same for the back!
The purfling channel has to be marked one blade at the time because of the fluting being there already. This was very new to me, and certainly not easy compared to last years method on a flat platform.
The channel is done on front and back.
The purfling is glued! This is a detail of C bout with top and bottom corners.
Now is the time to finish the fluting to its final depth and up to the edge (as I left a small margin when doing the pre-fluting). On this photo, you can see how the fluting continues on the button.
A detail of a top corner on the back, with the finished fluting.
The arching is now completed using the thumb planes and scrapers.
When scraping the archings, I use a straight edge and shadow to look for any bumps or undesirable flat areas.
The back arching is finished and cleaned.
The front arching is almost done, the next step is to make the f-hole template, mark the f-holes on the front and carve the f-hole fluting.
Hollowing of the back with the gouge first.
Then with the thumb planes. If you click on this photo, you can see more clearly the marks of the toothed blade I used to plane the flamed maple.
Thiknessing the back.
The f-holes are marked on the front.
skip to main |
skip to sidebar


Followers
Blog Archive
About Me

- Emilio
- Newark, Nottinghamshire, United Kingdom
- Violin making is a real passion for me. I think it is one of the most beautiful arts because it is combining woodworking and music. I find it extraordinary to create something out of a piece of wood which is going to be used by the violinist to make a sound and create music! I also like the fact that every piece of wood is absolutely unique and so is every violin. Enjoy the photo's of my work! Emilio


No comments:
Post a Comment