Tuesday, 26 February 2013
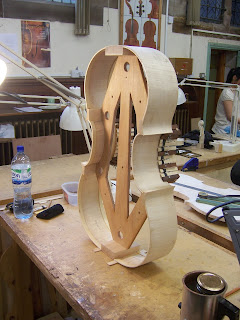
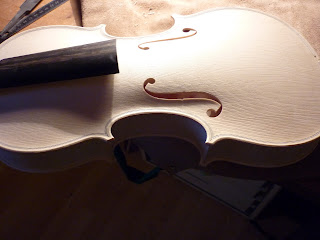
Two random photos from making my cello.
Cutting the f-holes! One of my favorite jobs!
On this one, I'm finishing the edgework of the back. A cello is surprisingly big!
(These photo's are taken by Bastien Borsarello)
Sunday, 24 February 2013
Just a few photo's of the cello finished in the white and then varnished!
This photo shows the cello with the finished box (the edgework still needs to be done!)
And the scroll and fingerboard are finished as well. The neck needs to be shaped.
I put them separately in the uv room and varnished them separately.
This was easier to handle as the whole cello would have been quiet big and not so handy to varnish.
This is the result after the ground.
I used nitrite, saffran and oil varnish (rubbed on the surface to seal the grain.)
This is the colour with one our two coats of home cooked oil varnish.
The back and ribs with also one or two coats of varnish.
This is the finished varnish! at this point i fitted the neck into the body!
Soon some photos of the finished cello with the strings on!
Saturday, 22 September 2012
Francesco Ruggieri cello.
My third year project at the Newark school of violin making is based on a Francesco Ruggieri cello made in 1695. The original cello is exposed in the Royal Academy of Music in London. The instrument has been cut down, but I decided to copy the outline as it is. I chose this model for its very beautiful outline with long and thin corners that give the instruments an elegant look. I also wanted to make big archings to change from Stadivari models!
Here you can see the ribs on the 3-piece mould. The idea is to take out the top and bottom parts of the mould before gluing in the linings, that way the whole ribstructure is a lot lighter and it makes it easier to take the mould out after gluing the ribs on the back.
This is the bottom corner of the ribstructure on my drawn outline. It is a nice way to check the length of the corner.
I drew the corner with the purfling to determine important details like width of corners, distance between edge and purfling, width of purfling...
Now you can see that I took off the top and bottom parts of the mould to keep only the middle frame which is holding the blocks. Now I can fit the linings!
The ribstructure is finished!
After the linings are fitted and glued on the two sides, the ribs have to be flattened and the ribhights are finalised. I decided to have the highest point in the C-bouts and have a taper on both top and bottom bouts.
Once that is finished, I scribe the outline on front and back plates (which I joined and flattened at home!)
The rough arching on the front.
The rough arching on the back! It's bloody hard!
Rough arching on the back.
Rough arching on the back.
This is a test peice I made to decide what edge hight I'm going to use. I'm doing the fluting up to the edge in the same way as I did on the Andrea Guarneri viola and the 'Viotti' Stradivari model.
Sunday, 26 August 2012
Saturday, 10 March 2012
Some close up photo's of the finished 'viotti' (edgework and f-holes).
Left bottom corner.
Bass f-hole and lable inside.
The back arching with low angled light. You can see the flames of the wood!
Finished neck shape.
Finished button.
Detail of finished button with locating pin. If you have a close look, you might see the scarf joint in the purfling!
Left top corner (back).
Shadow on f-hole fluting.


